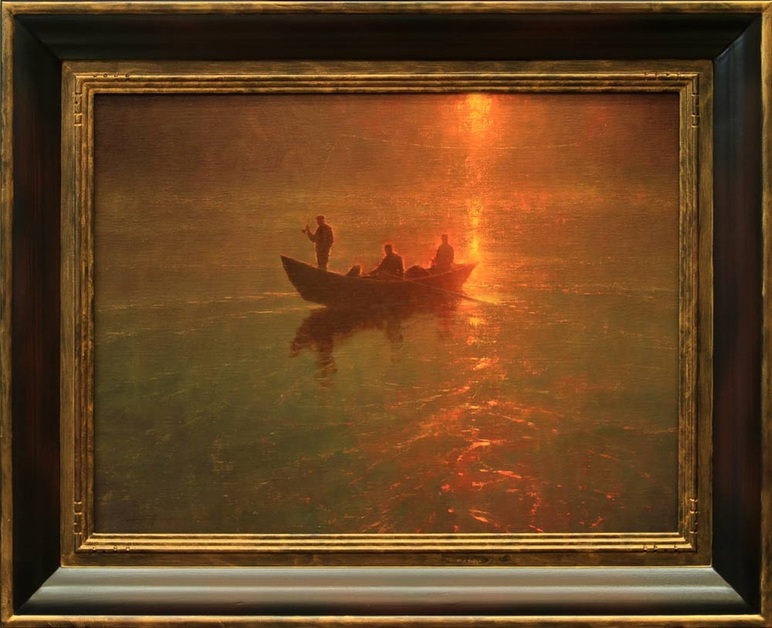
Below are a series of photos showing the process of creating a 18x24 oil painting on linen. It depicts a moody early morning scene of a drift boat w/ three fly fisherman, a subject and mood that really gets me excited.
This demo is also featured in a recently published book titled: "Fine Art Tips with Lori Mcnee: Painting Techniques and Professional Advice"
My friend and fellow artist Lori McNee has put together a collection of 24 of today's top artists showing how to transform dabs of paint into incredible still lifes, landscapes, portraits and wildlife art. Along the way, they generously share practical, real-world tips on everything from evoking the illusion of sparkling water to professional networking.
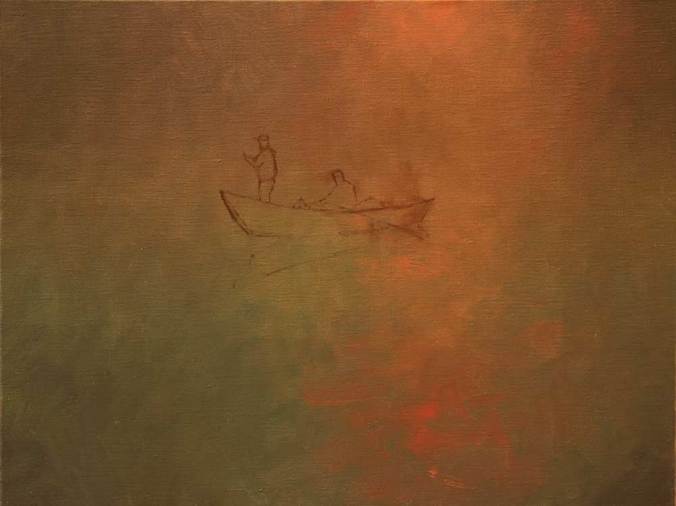
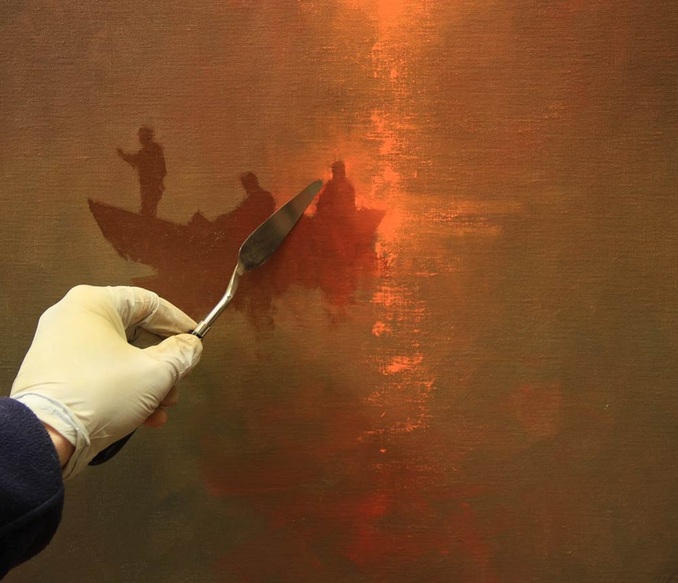
STEP 1. I begin by scumbling in a background color, setting the stage for the next steps. I let this underlying color dry before I begin painting the boat and figures over the top. Were this a smaller piece I would probably have painted it all wet into wet but because this is a little larger with a more complex drawing of the boat/figures, I wanted to have the background dry. I draw in the main subject with a small brush and thinned down paint. The dry background allows me to wipe off any mistakes in drawing.
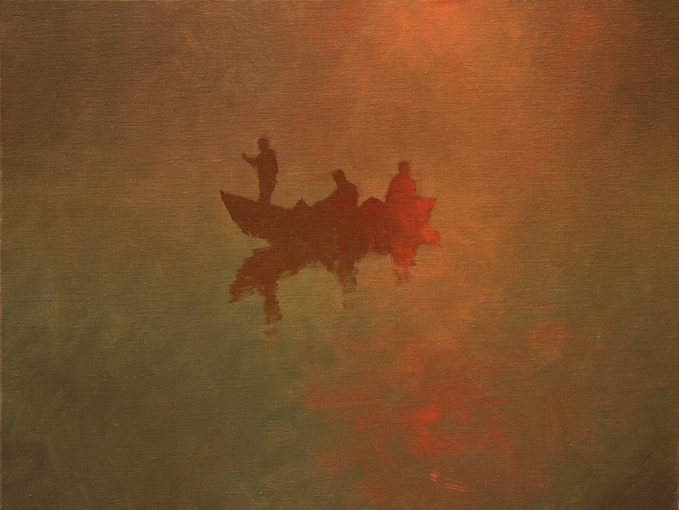
STEP 2: Now I begin to fill in the drawing outline I made earlier working from darker to lighter where the boat will be backlit. I use Liquin to thin my paint both in this stage and during the background underpainting. I like the way it improves the flow and gloss of the paint. The boat and figures are made up of transparent oxide brown, cadmium red light, yellow ochre, and a small amount of cobalt blue.
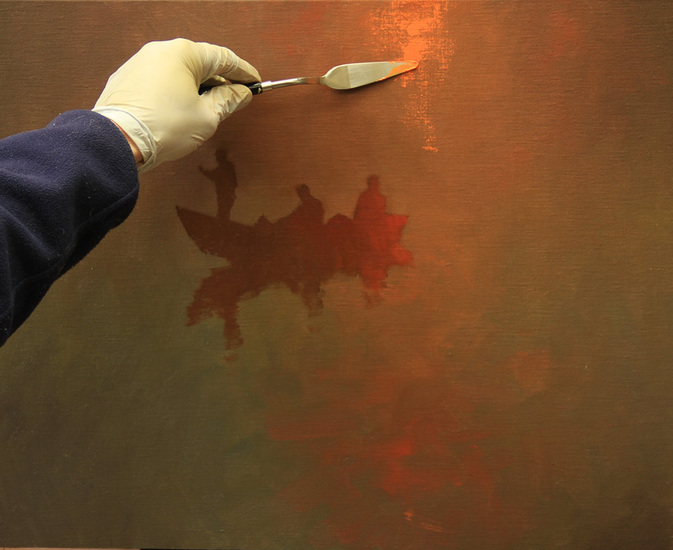
STEP 3. Once I've got the drawing of the boat completed and blocked in, I move to the streak of light that appears to be coming through trees and reflecting onto the water. I like to have my darkest darks and lightest lights established early on so I can judge all the other values based on those two extremes. I used cadmium orange, cadmium yellow, and white. This I apply with a palette knife which is my preferred tool. I lay the paint on impasto in spots and in other areas I just drag the knife with very little paint, basically letting it hit the tops of the weave which gives it a sparkly or grainy effect.
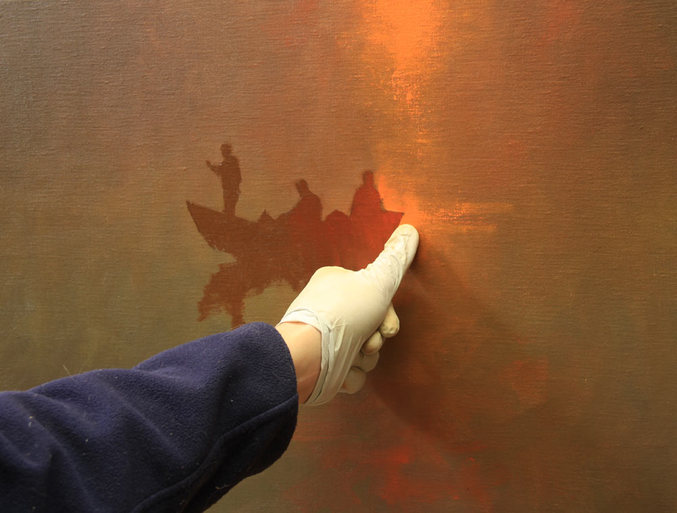
STEP 4. I wear gloves when I paint because I'm always using my thumb or fingers to blend and push the paint around. Here I'm blending and softening the edges where the boat meets the water and is strongly backlit.
STEP 5. I continue to refine my drawing by using the palette knife with color that is very close to my background color. This I lay on thinly with the knife and drag across the background and also working into my wet boat/figure color. I also continue to soften/blend with my trusty finger & thumb brush.
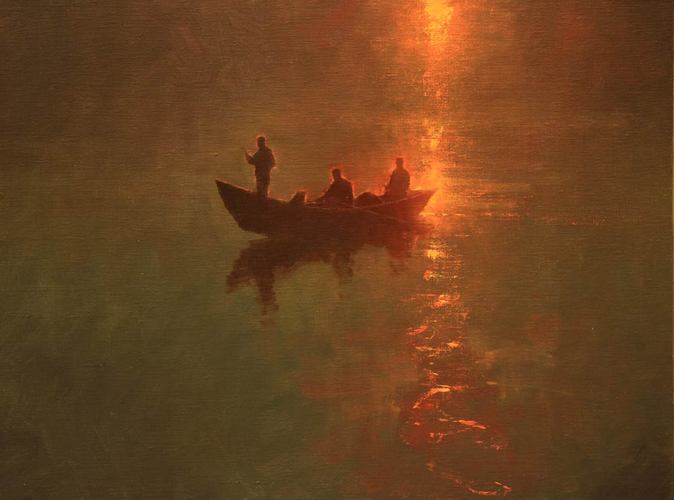
STEP 6. Here you can see that I've really refined the drawing on the boat/figures and increased the contrast by putting in more intense highlights. Edges and values are very important here to get the feel of backlighting; the edges have to be soft and lost in spots getting progressively harder as they move away from the light. This will give the illusion of intense light. I have worked my way from the back end of the boat up to the standing figure. I have to further refine his form and put a fly rod in his outstretched arm. As you can see I also brought more light down into the water to give the impression of movement and liquidity.
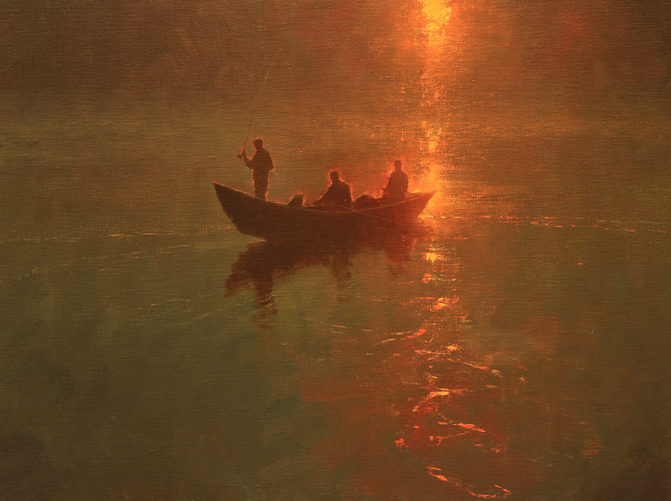
STEP 7. At this point I've continued to refine my standing fisherman and put a few ripple marks in the water to indicate motion and reflected light.
These water ripples have been done with the palette knife in both a dragging fashion and applying it more impasto in spots.
These water ripples have been done with the palette knife in both a dragging fashion and applying it more impasto in spots.
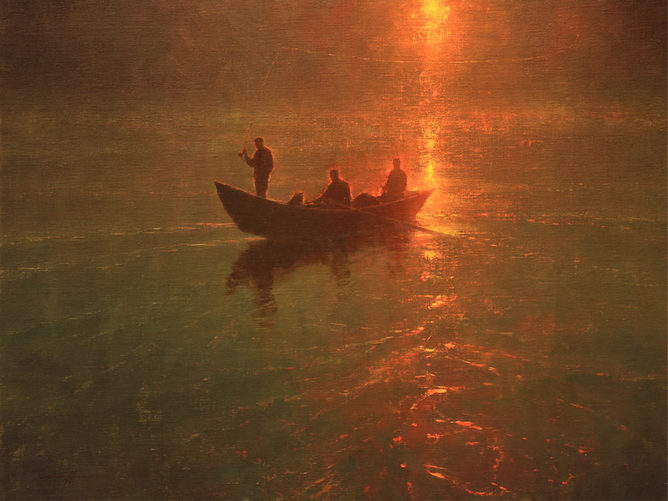
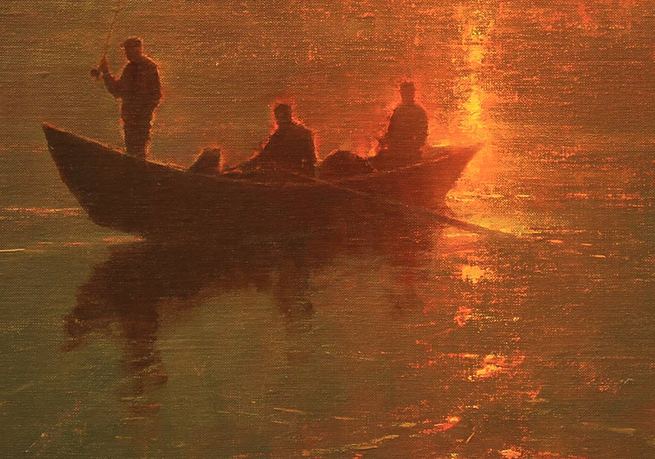
STEP 8. The completed piece. If you look closely you can see the fly line that is being cast by the fisherman. For this I used the edge of the palette knife dragging it very carefully in one pass varying it along the way to simulate being hit by the light. I've put the oar in as well. I've also added more interest into the water without hopefully overdoing it; and further enhanced the highlights, going one step lighter and brighter to enhance the contrast. I've also glazed some darker color into the corners of the painting with paint thinned with liquin. This has also increased the 'pop' of the piece.
Here's a closeup to show more of the texture and detail in the finished piece. As you can see the linen has a fair amount of 'tooth' and the knife really picks up the texture when dragging the paint across it lightly. This does a great job of simulating light sparkling on water.
D R I F T I N G I N T I M E
18 x 24 oil on linen - palette knife c. 2014
Commission for First Interstate Bank, Billings, MT
18 x 24 oil on linen - palette knife c. 2014
Commission for First Interstate Bank, Billings, MT
